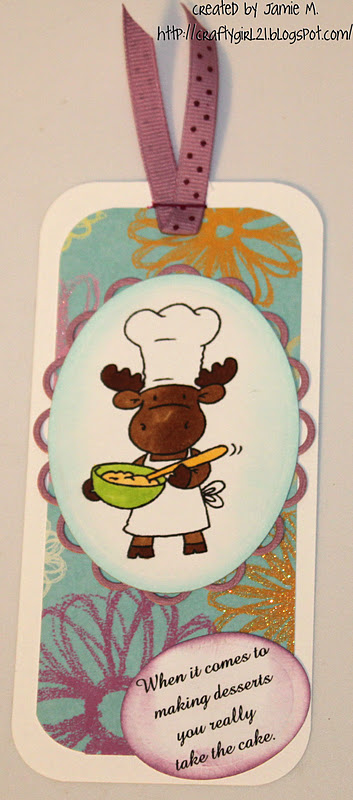
Here is a bookmark I made to hold my place in a cookbook. I liked this fun saying to go with it.
The paper is DCWV. I colored Mixing Bowl Riley with Copics and inked the edges of the ovals. I used my spellbinders to cut them out and Lacy Ovals for the one behind Riley.
Wednesday, January 25, 2012
Riley Sneak peek week 4
Shoe Shopping Sophie is the perfect girls night/day image. I love shoes so I can relate to this image.
Paper is My Mind Eye
Gems put on with Irock
Copics used to color Sophie
Spellbinders and Fiskar punch
Come back tomorrow for the blog hop, a chance to win a free stamp, and to see all the new releases. TFL!
Paper is My Mind Eye
Gems put on with Irock
Copics used to color Sophie
Spellbinders and Fiskar punch
Come back tomorrow for the blog hop, a chance to win a free stamp, and to see all the new releases. TFL!
Tuesday, January 24, 2012
Riley Sneak Peek Week 3
I made a mini card with Cell Phone Riley. The perfect stamp for a general/just because card.
I used paper from my scraps. Spellbinders Lacy squares to cut Riley out and inked the edges. The pink-blue twine was perfect with this paper. The Hello stamp is a Fiskar stamp. A couple more days until the release of all these sneak peek images! Come back tomorrow for another peek :)
Riley Sneak Peek Get Well
I love the pj's on Riley. If you saw my previous post this week then you
saw some of the other sneak peaks of the stamps available from Riley and Company on Thursday when we will have a blog hop (January 26th, 10 PM EST) where each blog will have a stamp winner
and stamps will go on sale.
Paper is from my scraps so can't remember where it is from
Get Well Soon stamp is from Inspired Stamps
Copics for coloring the image ~~I put orange juice in his cup :)
Studio G ink for the edges of the ovals.
Spellbinders Lacy Circles and Ovals
gems and brads
white gel pen
Monday, January 23, 2012
Sew Many Circle Challenge
Sew Many Cards is having a circle challenge this week. I made a circle card using my Spellbinders circles and lacy circles. I used Bailey from the latest release and colored him with Copics.
Now head on over to Sew Many Cards and linking up a card with circles somewhere on it. Thanks for stopping by!
Sunday, January 22, 2012
Riley Sneak Peek Bookmark
Here is another Riley Stamps sneak peak. Reading Riley is a stamp I will be using often seeing as how I am a 3rd grade teacher. My kiddos with love him. I am currently working on another project with him :) I made a girly bookmark with him. This tutorial can be found on Splitcoast stampers~~corner bookmark.
Paper is from The Paper Studio Just Married.
Copics for the image
Spellbinders Lacy Circles and circles
Studio G ink for the edge of the white circle
Twine
Saturday, January 21, 2012
Riley Sneak Peek Week
How cute is this baby! Baby Blocks Riley is one of the newest stamps available from Riley and Company this coming Thursday 26th January. I am excited to be the guest designer for Riley Stamp company this month. I have made several things with some super cute images. Come back this week and check out the other cute stamps and check out the other DT members for their sneak peaks.
Here is what I used-
Paper- The Paper Studio Just Married
Tiny Miracle- Pink By Design Stamp Set- Baby Love
Spellbinders Lacy Circles & Ovals
Fiskars border punch
Ribbon & baby pin brad
Copics for coloring image
Thursday, January 19, 2012
Inspired Stamps Nature & Scripture
![]() |
| http://www.inspiredstamps.com/servlet/the-105/Hope-Transformed/Detail |
Tuesday, January 17, 2012
Bugaboo two of something
Bugaboo 2 of something challenge- I used two designer papers and two heart brads. I love turtles so I had to have this turtle from Bugaboo when I saw it. I colored it with Copics and chalked the edges.
Here is another turtle image card I made as well :) technically this one has two designer papers so it qualifies as well.
Bugaboo Birthday Challenge
I love this little monster from Bugaboo and the Pink By Design ROAR stamp sentiment goes perfectly with it. It is Bugaboo's birthday this week, a challenge each day, and here is my birthday card.
Monday, January 16, 2012
Bugaboo Sketch #102
Bugaboo is having a birthday week and a challenge each day. I am trying to keep up :) I love turtles so I have all the holiday turtles. This is my first St Patty's card for this year.
Sew Many Anything Goes Challenge
Sew Many Cards challenges are starting for the new year. This week is anything goes and there are new releases that are soooo cute. Here is Eris Valentine. I colored the image with Copics and added Stickles to the cheeks and heart.
I bought a single sheet of this paper at Hobby Lobby and it has so much going on that I didn't put too much on this card, a couple heart brads and some twine.
Make sure to go link up your current project on Sew Many Cards challenge blog.
I bought a single sheet of this paper at Hobby Lobby and it has so much going on that I didn't put too much on this card, a couple heart brads and some twine.
Make sure to go link up your current project on Sew Many Cards challenge blog.
Sunday, January 15, 2012
CDAC New Year Challenge
CDAC is starting their new challenge. This is one of the images you could get for free for joining the challenges. It is so relaxing that I thought it perfect for a new year. I hope that everyone's year brings them peace and relaxation. I see travel in this picture which is a passion of mine. This image is from Firecracker Designs. I colored it with Copics and used chalk on the top to make the sky have some blue in it. The card was cut from Birthday Bash.
Head over to CDAC and play along and pick up some fun images for the New Year!
Labels:
CDAC,
Copic Markers,
Cricut,
Design Team,
digi stamp,
Twine
Friday, January 13, 2012
Pattie's Creations Fun Fold Challenge.
I was excited to see this image at Pattie's Creations shop. My hubby and I are big wine drinkers and this image is pretty to go with a bottle of wine.
This was a fun easy fold that I had never tried before. I like how it came out. I used this tutorial for my double dutch fun fold. Check out all the great new images Pattie has put in her shop and dont forget to join in on the fun challenges at http://pattiescreationschallenge.blogspot.com/. Thanks for stopping by!
Thursday, January 12, 2012
Inspired Stamp Sneak Peak
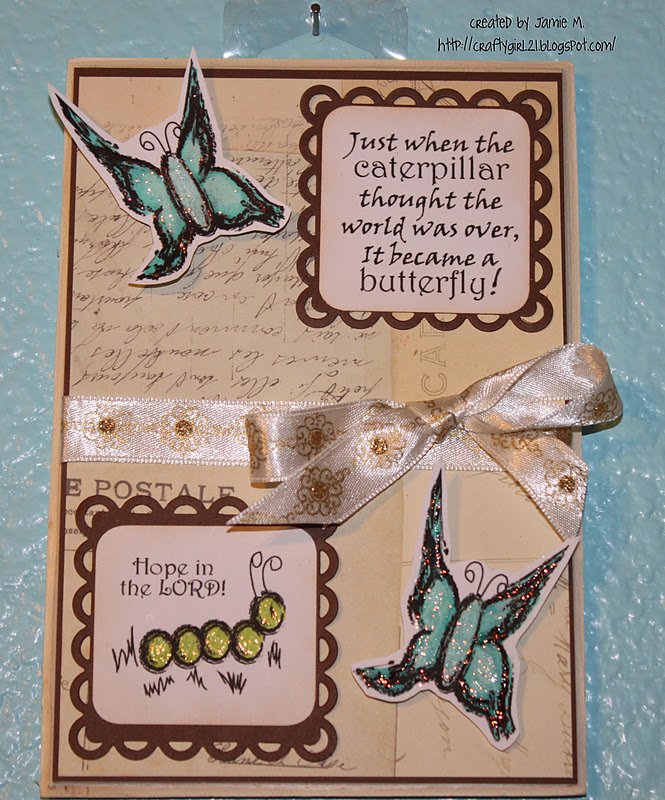
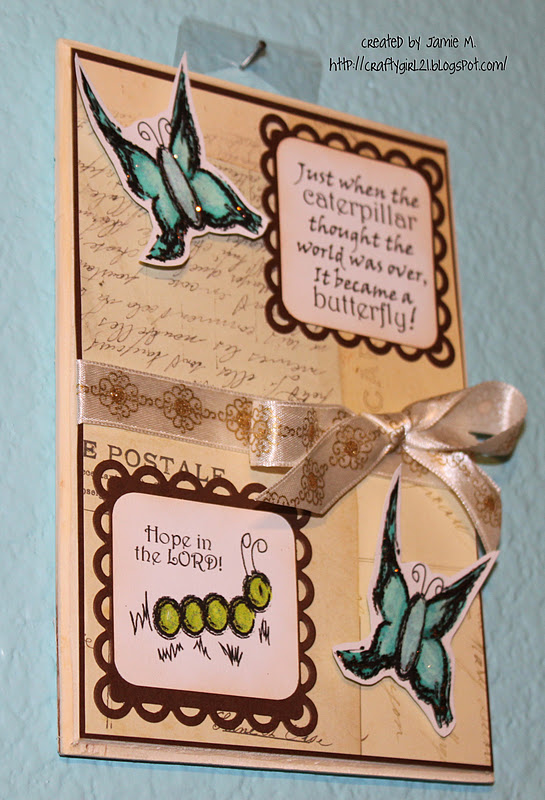
I made this wall plaque from a piece of wood that I found at Joann's . I thought this new set would be perfect to display in my craft room. I just love this set.
I used Modge Podge to put the brown paper on the wood then added the decorative paper on that. I colored the stamps with Copics and added Stickles. These will be available on Friday at Inspired Stamps along with some other great stamps.
Friday, January 6, 2012
Love Bugs Banners for Kids Day 1
Welcome to the “Love Bugs Banners for Kids” Hop.
Forty very talented crafty people have come together for a two day hop (Friday, January 6th and Saturday, January 7th) to showcase handmade banners that will be donated to the children at Pediatric Specialty Care. The hope of these banners is that they bring smiles to these children's faces and awareness of Pediatric Specialty Care to all those that hop along.
The “Love Bugs Banner for Kids” Hop has some awesome sponsors and prizes to give away to all those that hop along and leave comments. The more blogs you visit and leave comments at, the more chances you have of winning. That means if you hop through all 20 blogs each day and leave a comment on each blog then you are in the drawing 40 times!
Our Generous Sponsors are:
Jellypark Digital Stamps will award 2 free digi-images to one winner.
K Andrews Designs has donated a stamp set to one winner.
Robyn's Fetish will donate FIVE digital images of the winner's choice as a prize!
Now on with the hop....If you have come from Denise http://vintageheartfeltdesigns.blogspot.com/ then you are on the right track but if you have come here by chance – great! but please start from the beginning at Ellen and continue through from there.
I made a very simple banner this time. I cut the circles with Spellbinders Lacy Circles and the bugs from Create a Critter and another cartridge that I cant remember at the moment.
Thank you for joining us today on our “Love Bug Banner for Kids” Hop for the children of Pediatric Specialty Care. Please continue on to Teresa at http://scrappintplace.blogspot.com/
Have a wonderful day.
Forty very talented crafty people have come together for a two day hop (Friday, January 6th and Saturday, January 7th) to showcase handmade banners that will be donated to the children at Pediatric Specialty Care. The hope of these banners is that they bring smiles to these children's faces and awareness of Pediatric Specialty Care to all those that hop along.
The “Love Bugs Banner for Kids” Hop has some awesome sponsors and prizes to give away to all those that hop along and leave comments. The more blogs you visit and leave comments at, the more chances you have of winning. That means if you hop through all 20 blogs each day and leave a comment on each blog then you are in the drawing 40 times!
Our Generous Sponsors are:
Jellypark Digital Stamps will award 2 free digi-images to one winner.
K Andrews Designs has donated a stamp set to one winner.
Robyn's Fetish will donate FIVE digital images of the winner's choice as a prize!
Now on with the hop....If you have come from Denise http://vintageheartfeltdesigns.blogspot.com/ then you are on the right track but if you have come here by chance – great! but please start from the beginning at Ellen and continue through from there.
I made a very simple banner this time. I cut the circles with Spellbinders Lacy Circles and the bugs from Create a Critter and another cartridge that I cant remember at the moment.
Thank you for joining us today on our “Love Bug Banner for Kids” Hop for the children of Pediatric Specialty Care. Please continue on to Teresa at http://scrappintplace.blogspot.com/
Have a wonderful day.
- Ellen ♥ CardMonkey - http://cardmonkey-business.blogspot.com/
- Sandie Dunne - http://sandieshores.blogspot.com/
- Lori Apgar - http://scrappinmystressaway.blogspot.com/
- The Scrapbooking Queen~ www.thescrapbookingqueen.com/
- Linda Simpson - http://lindasimpsoncraftypieceofheaven.blogspot.com/
- Beckie Woodall - http://justbcreativecrazy.blogspot.com
- Lisa Lam- http://craftylam.blogspot.com/
- Jenny (Crazy About Cricut) - http://crazyaboutcricut.blogspot.com/
- Ashley - http://theglamoroussideofscrapping.blogspot.com/
- Haidee-http://created2bunique.blogspot.com/
- Carol - http://cardstockscissorsandglue.blogspot.com/
- Edwina - http://edwinascreations.blogspot.com/
- Jearise - http://lorbysworld.blogspot.com/
- Janet S - http://ladyluvbug.blogspot.com/
- Denise - http://vintageheartfeltdesigns.blogspot.com/
- Jamie You are Here
- Teresa - http://scrappintplace.blogspot.com/
- Alina - http://neverstopscrapping.blogspot.com/
- Dena - http://missdjones.blogspot.com/
- Martha- http://pattisscrapingtime.blogspot.com/
- Erica http://mycricutcraftroom.blogspot.com
Thursday, January 5, 2012
Inspired Photo Frame
I found this wood frame at Hobby Lobby for $3.99 at 80% off. What a smoking deal. I figured I could find a use for it. I wanted to put a scripture stamp on it but it needed something else so I added the HLO praying girl and with some buttons & ribbon there you have it. I made the tan background paper fit the frame then added the decorative paper on that. I then applied Modge Podge all over the wood frame and added the paper to the frame.
The stamps are from Inspired Stamps. I colored her with Copics. If you have not checked out Inspired Stamps yet you should. They have great stamps and wonderful tutorial/ideas all the time.
Sunday, January 1, 2012
Wine Cork Gifts
These were so much fun to make. Like a puzzle. I had to cut pieces to fit into spots and I used more hot glue than I ever have in my life.
I made 29 of these ornaments. It took several tries and different ways to do it before I figured out the easiest and quickest way. I saw these projects online that people were selling so no instructions could be found. Here is how I did these ornaments.
First drill holes in the wine corks. The make your bows. I tied mine with twine and used my bowdabra to make mine since I can't make a bow very well.
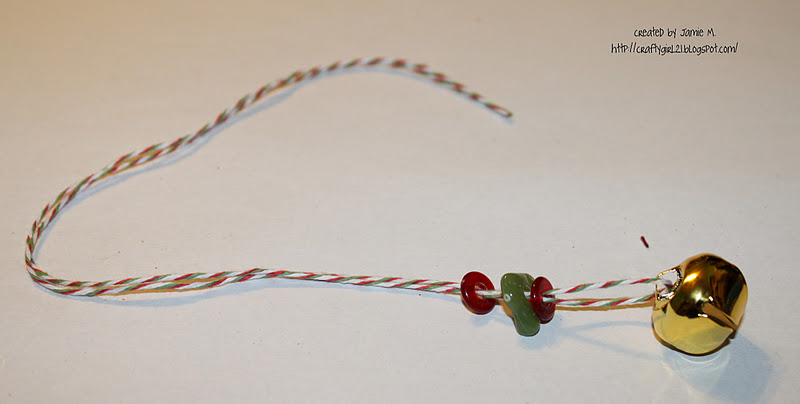
After those two above are done I them took twine and looped a bell and beads with it.
I put the twine through the cork. I used the tool I made out of a hanger to push it through.
Then I tied the bow on top of the cork very tight.
That is how I found them to be the easiest to make. I tried lots of different ways but made my last ten like this one above. Here are some others I made.
Now what else can I make out of wine corks. I still have A LOT of them. Hmmmm....
I made 29 of these ornaments. It took several tries and different ways to do it before I figured out the easiest and quickest way. I saw these projects online that people were selling so no instructions could be found. Here is how I did these ornaments.
First drill holes in the wine corks. The make your bows. I tied mine with twine and used my bowdabra to make mine since I can't make a bow very well.
After those two above are done I them took twine and looped a bell and beads with it.
I put the twine through the cork. I used the tool I made out of a hanger to push it through.
Then I tied the bow on top of the cork very tight.
That is how I found them to be the easiest to make. I tried lots of different ways but made my last ten like this one above. Here are some others I made.
Now what else can I make out of wine corks. I still have A LOT of them. Hmmmm....
Subscribe to:
Posts (Atom)