Awesome Followers

Showing posts with label Prism Colored. Show all posts

Monday, July 4, 2011

Eris Birthday Card ~Pink

I used 3 different punches on this card. A designer corner punch, a scallop and a scallop with holes.
Recipe
Sew Many digital stamp Eris Birthday
Stampedous Two You stamp
ink
Prism colored pencils blended with gamsol
ribbon
paper- The Paper Studio -So so Sweet pack
white pen for faux stitches
corner chomper
3 above mentioned punches

I am entering this card in this challenge
There She Goes Three different punches

Monday, May 30, 2011

Liberty & Justice Card-Shaving Cream Background

I used Sew Many digi stamp Ali Independence Day. Isn't he cute. I colored with my prism colored pencils and blended with gamsol. I printed out the sentiment and used my Irock to add the gems.

Now for the shaving cream background. I found this technique in an old Paper Crafters magazine and thought it would be fun. It was.
 So you get a shallow bowl and add shaving cream to the entire bottom of the bowl. Flatten it out and add dots of alcohol ink. Then swirl them around in the shaving cream. Then place the paper on top of the shaving cream face down and lightly press down. Lift up and scrap off the extra shaving cream. I will try to scan the pages from the magazine if I can figure out which one it is. My explanation might not be that good its late. I will explain again in more detail on the next post when I use the other colors of the papers I made. Here are the close ups of 4 of the backgrounds.


I am entering this card into these challenges.
Fairy Knoll Memorial Day
scrapalicioususa Memorial Day
StampInsanity- Red, white & blue

Friday, May 27, 2011

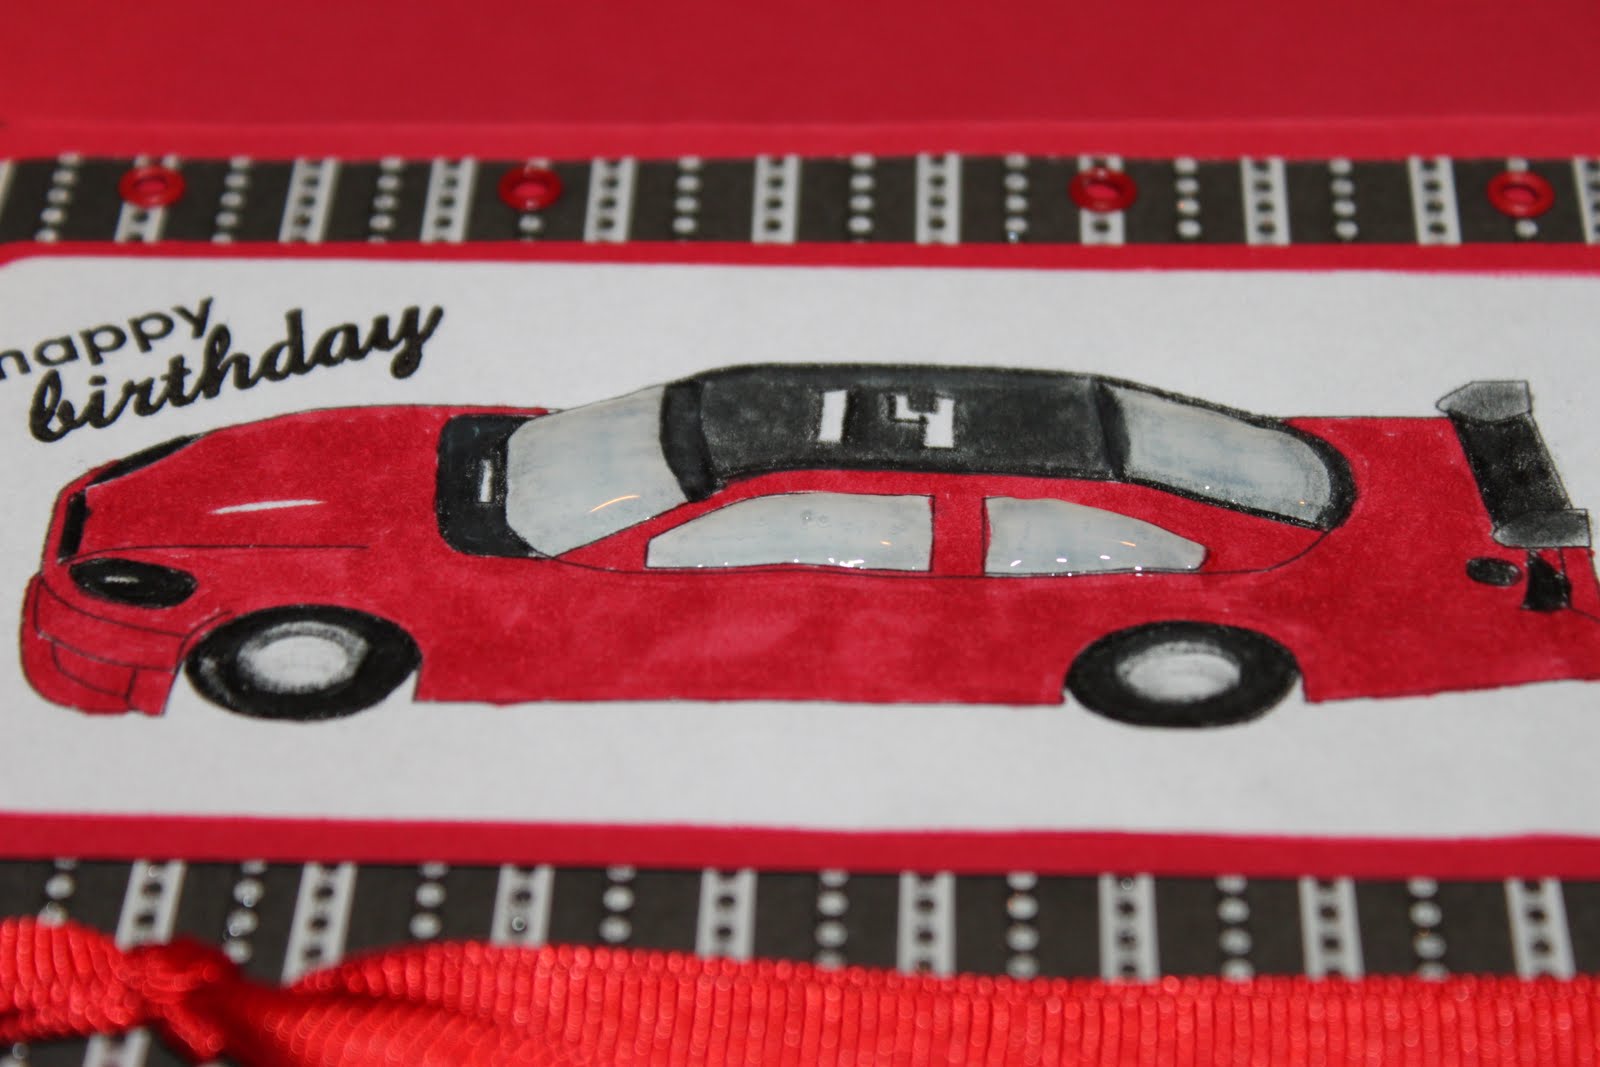
Nascar Birthday Card

I made my first Nascar themed cards. The best thing about selling my cards is that I get to make things I would not normally make.
I got this car from a wonderful person that was sharing it on their blog for free. I wish I had saved the link to share with you but of course I didn't. I googled and found it.
This card was colored with Copics and I added Glossy Accents to the windows.
This next card was made for the daughter of the other card. I actually colored the car in Photoshop and printed it out.
I embossed the white paper in the right corner and inked it with red ink. Added some twine and brads and there you have it.
Thanks for stopping by.

Tuesday, May 24, 2011

Kich N Bleus DT- Grad Cards


I colored the digi with prism colored pencils and blended with gamsol. I had some technical difficulties and I am not too happy with my coloring but it will be ok.  I  cut the card from Birthday Bash and added the metal accents with my Irock.
I just love these digi stamps. I already posted one of them however I made another to highlight this collection again.
I am drawn to the girl digi stamps even though I need to make a male grad card. The link below will take you to the store if you are interested. Thanks for stopping by.
http://kichnbleusdesignsstore.blogspot.com/

Saturday, May 21, 2011

Summer Themed Blog Hop

Welcome to my Blog, and the Summer Themed Blog Hop! If you've come from visiting Lezlye, you're in the right place. If you were just looking at my blog and want to play along with our blog hopping fun, you can go to the beginning at www.craftycardgallery.blogspot.com.  This blog hop is intended to help you in the mood for summer... I know that weather hasn't been all that helpful to many of us, so maybe crafts can help us get in the summer spirit!   So sit back, and enjoy the hop!

My cards for today are graduation themed. This starts off the summer :) So here you go.

 I used the same layout for both cards today. I used Kich N Bleus digi stamp for the first card. I just love this image. I colored her with prism colored pencils and blended with gamsol.

Here is the link to this super cute digital stamp. The whole set is only $4.99.
http://kichnbleusdesignsstore.blogspot.com/2011/05/new-kich-graduates-mini-collection.html

The next card I cut the Grad cap from A Child's Year and added some twine for the tassel. I am also entering these cards in this challenge Simply Create 44

Thanks so much for stopping by. I love new followers and comments from all you wonderful crafters. Come back and see me again.

Next up is Brynn

Here's the lineup:

Friday, May 6, 2011

Sew Many Blog Hop ~May Release

Welcome to Sew Many Cards Hop. We have some wonderful images for you to see today. I love this collection of stamps and I am sure you will too. I have one image for you to see here. I made two easel cards with Duncan Flying with letter image. Isn't he so cute? One lucky commenter will win this image today so make you leave me a comment below for your chance to win this cute little guy.
Also there is a secret message along this hop. Each blog has a letter that will give you a message that will win you not only the whole set but also a $15 gift card to Sew Many Cards! So visit each blog to get the letter to the message. In case you did notice my bold letters mine is N
If you are at my blog by chance go back to the beginning at http://www.sewmanychallenges.com/ to begin the hop and see all the wonderful images. If you came from Georgia then you are in the right place.


Here are closer pictures of the two cards.
I colored this one with my prism colored pencils and blended with gamsol.
I colored this one with Copic markers and used Distressed Ink to color the white ribbon to match.

If you like a challenge check out http://www.sewmanychallenges.com/ for some wonderful challenges and the beginning of this hop. NEXT UP Sarah F.

I would love to have you as a follower! Thank you for stopping by.

Wednesday, May 4, 2011

Sew Many Freebie Friday

There is a super cute freebie on Sew Many this Friday! I love this cute baby bee. Make sure you go by there and get it on Friday.

I am entering this card in this challenge
http://www.papertakeweekly.blogspot.com/

Tuesday, May 3, 2011

Cupcake Birthday Card

 I colored the cupcake with prism colors and blended with gamsol. I embossed the background paper and added some ink to make it pop. Glossy Accents on the cupcake wrapper.

Tuesday, April 19, 2011

Kich n Bleus DT -Coasters

Welcome to my Design Team post! I hope you enjoy the coasters I made. I was getting tired of only making cards so I thought I would change it up. We all had a certain image to use but I used a couple more as well. This set has some great Earthy images. Check out the Kich N Bleus store for all the details. So on to the details...
Well I figured out a few errors in my ways doing these coasters. So let me share with you my flaws so you don't have to go through them. I used cheap coasters that I had got from Michael's a long time ago that had some ugly design and covered them with paper. I taped them down with the best double sided adhesive in the world, the red lined tape. BIG MISTAKE. After applying Modge Podge it bubbled up big time. So on try number two I used Modge Podge to glue down the paper then more Modge Podge on top of the paper, laid down my image on that then more Modge Podge on top the whole thing. Seems to have worked this way.
I colored the image with prism colored pencils and blended with gamsol . I took picture of all three of them before I applied Modge Podge so you can see the details in the images better.

All three together after the Modge Podge
Here is what the finished products looks like. Now to see if they hold up after use. I will let you know, will I will make more if they work and let you know.


Now lets see what my team has made with the other cute images in this set. Check out the blogs below. Also don't forget to stop by the store and pick these cute images up if you want to use them :)
Kich N Bleus Designs~~ www.kichnbleusdesigns.com

Patty~~ http://cardsbypattytanuz.blogspot.com/
Liset~~ http://hailemnat.blogspot.com/
 
Jamie~~ http://www.craftygirl21.blogspot.com/
Mo~~ http://scrapandomeconlosrecuerdo.blogspot.com/

Thursday, April 7, 2011

Get Well w/ Jaden Get Well

 The case of this card is a flat square that is 5 1/2 by 5 1/2 in. The I cut a 5x10 in and folded it, then cut half of one side at a 90 degree angle. Adhere this piece. Then I cut a 5 1/2 by 9 1/2 piece of paper and folded it in half. That is the inside card. Hopefully the pictures help you see what I did because my explanation is not so good, its late :)
 I colored Jaden from Sew Many Cards with what little Copics I have and the pink with my prism colored pencils. I only have 6 copics so far and I am not great at coloring with them yet. Jaden is sooo cute.
Here is what the inside of the card looks like. I just stamped Get Well Soon on the bottom and left lots of room for the ladies to sign the card.


 Closer view of my coloring :)
The front I cute scallops and circles using my Nestibilities and printed the sentiment on my printer. I used my I rock to add the pink metallics on there. Thanks so much for looking. I love all your comments!

Tuesday, April 5, 2011

Anniversary Card using Kich n Bleus digi

April 4th is my two year wedding anniversary and I thought this digi would be perfect for my hubby's card.
I am doing a card swap and received my first set of cards and there was one like this that I just had to try. It is such a simple card to make that looks like it took hours.

Here is a closer view of this wonderful FREE digi on Kich N Bleus. I colored it with prism colored pencils and blended with gamsol. I cut the scallop and embossed it.
Check out the other DT projects.
Kich N Bleus Designs~~ www.kichnbleusdesigns.com

Patty~~ http://cardsbypattytanuz.blogspot.com/

Lisa~~ http://bitbythecricutbug.blogspot.com/

Jamie~~ http://www.craftygirl21.blogspot.com/

Mo~~ http://scrapandomeconlosrecuerdo.blogspot.com/

Monday, April 4, 2011

Toga Military Card for OWH

Here is where I got this digi for FREE! http://shop.sewmanycards.com/Patriotic_c144.htm This image is perfect for OWH so go get your copy now!
Here is a closer view of the finished image colored with prism colored pencils and blended with gamsol. I added Glossy Accents to the goggles.

Friday, April 1, 2011

Kich n Bleus Challenge 1

We have for you a NEW MONTHLY fun challenge for you and tons of inspiration !!!
We will give you ONE whole month to enter the challenge and the coolest part of all you can enter as many times as you wish! Just make sure you are following the rules!
 http://www.kichnbleusdesigns.com/
For every challenge we will ask that you use a digital image. Since we know that you might not have a Kich N Bleus image we are going to have a FREE image that has never been released before! How awesome is that! Now, we also understand that you might NOT feel inspired to use that image.... well here is the inspiration.... IF you use a Kich n Bleus image on your project then you will automatically get 2 entries!!! Yes!!! 2 entries on the challenge for using ANY Kich N Bleus image!!! How cool is that?!!? AND yes!!!! there is more!!!! Because it is our very first challenge we want to make sure that you get all the inspiration EVERY ENTRY IS A WINNER!!!!!! We have a MINI COLLECTION "Fairy Kich N Flowers" JUST FOR THOSE WHO ENTER THE CHALLENGE!!! This Mini-Collection will NOT be sold!

How is that for inspiration!!! So, let's get this party started!!!!

Here are the rules to follow:
 
*** Link your ORIGINAL post with project up to Inlinks
*** Mention that your project is for KICH N BLEUS CHALLENGE #1
*** Deadline for this challenge will be midnight April 30th PST
 *** Project of your choice (card, LO, altered item, ect.) 
***You have to use a DIGI image and Spring related!
 *** And most importantly, HAVE FUN!!

So here is my creations using several of the digis in this fun collection.  
 Card-fits in the purse
 Notpad-fits in the purse
 Ok on to the details...
 I did many different things on this card. Lets start with the background. I used Ranger Ricks alcohol inks to make the background paper and the scallop paper. I then sprayed the scallop with Glitter Mist in pink and blue and used my nestabilities to cut it. I added white metal accents with my I*rock. The ribbon I colored white ribbon with my Zig markers using three colors. Hand colored the digi with prism colored pencils and blended with gamsol. The eggs have glossy accents on them. 
 The details are hard to see on this one. I made the background of the digi with alcohol inks and colored the same way. On the paint on the egg I used UTEE. I love the way that came out. This is a Splitcoast tutorial which I made for one of my last posts as well. 
 I made this notebook from scratch using thick chipboard and added notebook paper in there. Used my bind it all to bind it. Hand colored the same us the above and added Glossy Accents on the ears.