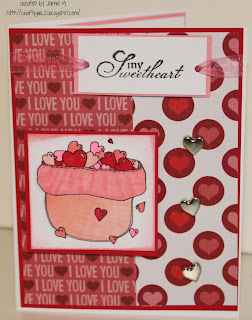
Ok my last Valentines for awhile. I used a Meljen's Designs image. I colored it with Copics and inked the edges. I used my spellbinders for the dies and the label.
I followed this Bugaboo sketch.
I am entering this card into the above Bugaboo sketch challenge and
Whimsy Stamps Challenge~ Anything Goes as long as its festive. To me anything holiday is festive but that is my take on festive.
Monday, December 31, 2012
Sunday, December 30, 2012
SSS191 Valentines Cutie
I used this adorable Bugaboo image and the wonderful sketch to make this cutie. I colored her with Copics and inked the edge. The rest I just followed the sketch.

I followed the sketch below.

Saturday, December 29, 2012
TSB Valentines Card
Valentine's Card #2
This image is currently a freebie on TSB here http://thestampingboutiquechallengeblog.blogspot.com/I colored it with Copics that were not cooperating. I inked the edge of the image. The sentiment is a Fiskar.
At first looking at this sketch I was confused but the samples made it click for me.
I am entering in these challenges.
Sweet Sketch Wednesday- The sketch above
Basic Grey Challenges ~ Anything Goes
Catch the Bug ~Holiday
PCCCS #22 Love is Sweet
Let the Valentine Cards begin. Here is my first one. The love stamp is Stampin Up.
This image is Meljen's Designs. I colored it with Copics and inked all around the image.
I followed this sketch http://www.papercraftcrew.com/
This image is Meljen's Designs. I colored it with Copics and inked all around the image.
I followed this sketch http://www.papercraftcrew.com/
Friday, December 28, 2012
SALS Birthday Boy Card
This card came out so fun and bright. I love it. I am trying to use more cardstock backgrounds.
Love this boy from Bugaboo. He is so cute and easy to color. The sentiment is from Stampin Up.
Love this boy from Bugaboo. He is so cute and easy to color. The sentiment is from Stampin Up.
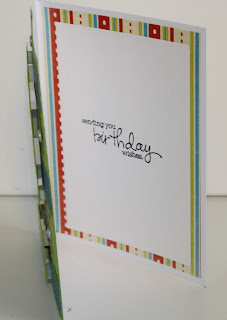
Here is the inside. I am making it a point to finish the insides at the same time as the card. Call it my crafty new years resolution.
I followed this sketch from Seems a Little Sketchy
Thursday, December 27, 2012
Mouse Sweet Bag
I made this cute little treat bag for a DT call last month. No luck on that but I sure think it is cute.
These kiss stamps are from Jaded Blossom.
This mouse is from KaDoodle Bug. The cup cake I embossed and added ink to the folder. I like how it came out. I will explain more later. Thanks for stopping by!
These kiss stamps are from Jaded Blossom.
This mouse is from KaDoodle Bug. The cup cake I embossed and added ink to the folder. I like how it came out. I will explain more later. Thanks for stopping by!
Wednesday, December 26, 2012
SSS190 Birthday Gift Bag
Happy Birthday to my friend Sara! Her birthday is today so it is a good day to post the bag I made for her gift. Can you tell her favorite color? I followed The Sweet Shop sketch below. Which I turned :)
I used The Stamping Boutique's Birthday Fairy. I colored her with Copics and added Stickles to the wings. The sentiment is a Stampin Up stamp.
Thanks for stopping by!
Tuesday, December 25, 2012
Letter Ornaments
I made these for my family. Funny that all my in laws names start with an M. My sister and I married to M last names and my sister in law married to a M last name.
I found this idea on Pinterest. I however did not follow the instructions they gave and just looked at the picture for inspiration.
For the letters I used a thick cardboard that I found at Hobby Lobby for 99 cents. I used Modge Podge to attach paper then cut around the letter. I sanded down the edges with a nail file to smooth them out. I took Stampin Up ink pads and sponge wedges and inked the entire sides and the edge of the front. I Modge Podged the sides first because the ink bleeds on the paper is you arent careful. After it dried a bit then I Modge Podged the entire front of the letter.
When the letter is completely dry I took an eyelet screw and screwed it into the top. Add ribbon to hang.
The little white tag is from the office supply store or crafty store. I used an inch stamp from Inspired stamps and stamped it several times then wrote the family name on it. I wish I had prettier hand writing but it is what it is.
These were a hit. Thanks for stopping by and Merry Christmas!!
Monday, December 24, 2012
Drink Holder Christmas Present
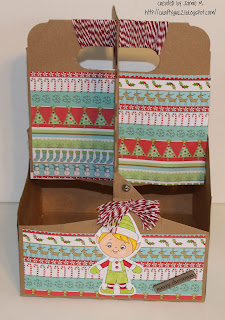
I made this to hold my cousins beverage of choice. I used Peachy Keen Stamps to decorate it.
I love this elf. I colored him with Copics and added Stickles to the cap. I made a fun twine pom pom.
This snowman is also super cute. I colored him with Copics and added Stickles to the hearts.
Hopefully a few people will see this since it is Christmas Eve! I am off with my families. Double Christmas Eve & Day for me. I hope you all have a wonderful Christmas and praise Jesus for saving us.
Saturday, December 22, 2012
Treat Holder for Baked Goods
Here is a container I am using to give out my baked goods. I will have several more of these :)
Merry Almost Christmas!
Merry Almost Christmas!
Tree Gift bags
I love this tree. So simple and cute. I cut it from Doodlecharms. These are 4 inches.
I added Peachy Keen faces and brads for "lights"
Thanks for stopping by! Merry almost Christmas.
I added Peachy Keen faces and brads for "lights"
Thanks for stopping by! Merry almost Christmas.
Friday, December 21, 2012
SS189 Reindeer Gift Bag
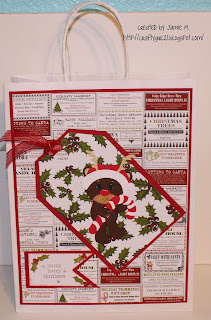
I made this gift bag following the Sweet Shop sketch below. I love this sketch so simple.
I used KaDoodle Bug's Rudy with Candy Cane cut. He is a cutie! I used a Stampin Up sentiment on the flag that I made in SCAL with a diamond and a rectangle shape together. The holly is from Inspired Stamps. The paper is Recollections.
Here is the full bag picture. Now who to give this too.
I am entering this into The Stamping Boutique Gift Wrap challenge. I am super sad that they are closing. I have loved their stamps for so long and will miss them greatly.
Thursday, December 20, 2012
Ornament w/box
I have to say this is one of my favorite gift ideas. This is a very quick gift to make also.
This front stamp is from Christmas Verses. I added a present shaped button to the front.
I used Inspired Stamps on all sides of the box. These were Vintage Christmas. I love this set.
I used Inspired Stamps 1.5 inch circle Christmas for the top. I cut an ornament from Joys of the Season Cricut cartridge.
Other details:
I cut this box using a Samatha Walker cut file. So easy! Love this file.
The name was cut using vinyl in SCAL but you could use any font Cricut cartridge.
The ornament was made with glitter. Such a simple gift. Floor wax and fine glitter.
Head on over to Inspired Stamps and see what the others came up for last minute Christmas Gifts.
I am entering this into The Stamping Boutique Gift Wrap challenge.
Subscribe to:
Comments (Atom)


